Winter Warmer Oatmeal Cookies (GF/DF)

Juggling a day job I love with managing a chronic illness has not left much time for deliberate recipe development lately. However, the Gent and I have been enjoying delicious variations of these gluten-free, dairy-free cookies all winter, and this particular flavor combo was just too good not to share.

winterwarmeroatmealcookies

Winter Warmer Oatmeal Cookies

1/2 cup coconut oil, soft but not melted

1/2 cup coconut sugar

***

2 eggs, room temperature

1 tsp vanilla extract

1/2 tsp orange extract

***

1 1/4 cups GF oat flour or Pamela’s Wholegrain GF Bread Flour or a 50/50 mix of both*
(*my favorite option)

2 tsp ground cinnamon

1 tsp baking powder

1/4 tsp kosher salt

***

1 1/2 cups GF rolled oats or quick oats

1/2 cup unsweetened, shredded coconut

1/2 cup dark chocolate chips

1/2 cup dried cranberries

Preheat oven to 375 F. Line two baking sheets with parchment paper.

In a large bowl, cream together the coconut oil and coconut sugar. Beat in the eggs and extracts.

In a medium bowl, sift together the flour(s), baking powder, cinnamon, and salt.

Stir the dry ingredients into the wet ingredients until well combined.

Fold in the rolled oats, shredded coconut, chocolate chips, and dried cranberries.

Scoop spoonfuls of dough and roll into loose balls roughly 1 1/2″ in diameter. Press slightly onto baking sheet. Bake 9 to 11 minutes, or until just slightly browning. Let cool on the baking sheet for 2 to 3 minutes, then transfer to a rack to cool completely. The texture will be best if these cookies are slightly underbaked rather than overbaked. Store in an airtight container at room temperature. Makes 2 dozen cookies.


Posted in Anti-Inflammatory Ingredients, Breakfast, coconut oil (virgin/ unrefined), Dairy-free, dark chocolate (70% cocoa or more), Desserts, fruit, Gluten-free, Nut-free, Recipes, Snacks, spices | Leave a comment

Fig Snack Bars Worthy of Sir Isaac (GF/DF/NS)

FigSirIsaacs

After years of saying to the Gent every time we walked down the grocery store cookie aisle, “you know, I’d really like to create a whole food, gluten-free, low-glycemic version of Fig Newtons…” I have finally done just that. And now, of course, I’m kicking myself for not getting around to it sooner. These slightly sweet, chewy snack bars taste just right alongside an afternoon cuppa, or when grabbed for an on-the-go breakfast on the way out the door. Like most of the other recipes here, they are also gluten-free and dairy-free.

Fig Snack Bars

For the dough:

1 cup almond meal

1 cup certified gluten-free oat flour

1 cup Bob’s Red Mill Gluten Free All-Purpose Flour

3 Tbsp coconut sugar

1/8 tsp salt

3 Tbsp ground flaxseed

2 large eggs

2 Tbsp melted coconut oil

1/2 cup unsweetened applesauce

1/2 tsp vanilla extract

1/4 tsp almond extract

For the filling:

8 dried Calmyrna figs, stems trimmed

6 medjool dates, pits removed

up to 2 Tbsp water, as needed

Whisk the dry ingredients for the dough together to break up any clumps in the flour.  Work in the wet ingredients with a wooden spoon or paddle until a uniform, soft dough forms.  Divide the dough into two balls, wrap each individually with cling wrap, flatten into disks, and refrigerate for 2 hours (or as long as overnight).

When ready to bake, preheat the oven to 350 degrees F.

Place the dried figs and medjool dates into a food processor with 1 tsp water. Puree until smooth, adding more water 1 tsp at a time as needed. Use as little water as possible to achieve a smooth, spreadable consistency.

Place one ball of dough on a sheet of parchment paper, leaving the remaining dough in the refrigerator to keep it cold. With a piece of cling wrap on top of the dough to prevent it from sticking to the rolling pin, roll out the dough into a rectangle that is approximately 7″ x 10.” Trim, reshape, and pinch the dough together as needed to achieve a rectangular shape. Lift the parchment paper to transfer the dough to a baking sheet.

Using an offset spatula, spread all of the filling over the rolled-out dough to just shy of the edge of the dough on all sides.

On a second piece of parchment paper, roll out the second piece of dough just like the first, making the rectangle slightly bigger than the first. Using the parchment paper as a support, carefully lift and flip the second piece of dough onto the filling. Seal the edges of the dough on all four sides by pinching together gently. Use a spatula to gently pat the dough smooth on all edges. Bake for 20 to 25 minutes, until the dough looks pale and dry all over.

Let cool completely, or the filling will stick to the blade when you try to cut these! Using a rotary pizza cutter (or a sharp knife), cut into 36 rectangular pieces. Store in an airtight container at room temperature, or freeze.

Posted in Anti-Inflammatory Ingredients, Breakfast, coconut oil (virgin/ unrefined), Dairy-free, Desserts, fruit, Gluten-free, monounsaturated oils, nuts, Recipes, seeds, Snacks, Vegetarian | Leave a comment

Dessert or Breakfast? Rustic Vanilla Crema & Berry Tart with Almond Crust (GF/DF/NS)

This presentation board was a gift from my thoughtful sister-in-law.

This gorgeous, custom-carved presentation board was a gift from my thoughtful sister-in-law.

On lazy Sunday mornings with the Gent, I’m often guilty of making dessert for breakfast. “Guilty” is perhaps not the best choice of word, however, since this nutritionally dense, gluten and dairy free, protein-packed, low glycemic tart actually makes for a virtuously healthful breakfast. It fueled us well for several hours of hiking the lush perimeter of Lums Pond State Park on a sunny, breezy summer day. This creamy tart loaded with juicy fresh fruit can be enjoyed at room temperature, but I love it best straight from the refrigerator after it has chilled for several hours or overnight. Celebrate summer and enjoy it for dessert or for breakfast!

Rustic Vanilla Crema & Berry Tart with Almond Crust

For the filling: 

1 cup raw cashews

1/4 cup plus 1 Tbsp coconut oil, melted

5 large medjool dates or 3 Tbsp coconut sugar

1/4 cup water, or more, to desired consistency

1 tsp fresh lemon juice

1 1/2 tsp vanilla extract or vanilla bean paste

***

For the crust:

Gluten free almond meal tart crust recipe from Elana’s Pantry

***

For the topping:

about 1 cup mixed fresh berries

For the filling: Combine the cashews with 2 cups cold water in a medium bowl and set aside to soak for 1-2 hours. Drain. Puree the cashews and remaining filling ingredients in a Vitamix or food processor until very smooth and creamy. Add more water 1 Tbsp at a time, if needed. Pour the filling into a small bowl, cover, and chill in the refrigerator until it firms up, 1 hour or more.

For the crust: I see no reason to reinvent the wheel, and by “wheel,” I mean the excellent, simple, almond meal tart crust from Elana’s Pantry.

Preheat oven to 400 degrees F. You can use a tart pan as Elana’s recipe describes, or you can skip the pan and go for the rustic look pictured above. Gather the dough into a ball and set it on a large square of parchment paper. Lay a sheet of cling wrap over the dough and roll it out to a roughly shaped circle about 10″ in diameter. Remove the cling wrap. Lifting the edges of the parchment paper to help handle the dough, lift about 1/2″ of the outer edge of dough and fold it inwards to make a rim. Pinch the dough with your fingers to make a decorative edge, if desired. Carefully lift the parchment paper to move dough to a large baking sheet. Bake for 15-20 minutes, watching carefully towards the end to avoid burning. When the tart crust is golden brown, remove it from the oven and let cool to room temperature.

To assemble the tart: Whisk the filling to loosen it up. Pour the filling onto the tart crust and gently smooth it out to the edges using a rubber or offset spatula. Top with sliced strawberries and blueberries, or the berries of your choice.  Serve immediately or loosely cover with cling wrap and chill until ready to serve.


Posted in Anti-Inflammatory Ingredients, berries, Breakfast, citrus, coconut oil (virgin/ unrefined), Dairy-free, Desserts, fruit, Gluten-free, hiking, monounsaturated oils, nuts, Vegetarian | 2 Comments

The Bright Taste of New Beginnings & Lemon Custard Sauce (GF/DF)

The New Year kicked off with a new opportunity for professional change and growth for me. After a bit of soul-searching and a lot of discussion, the Midwestern Gentleman and I decided we were ready and willing to embrace a new adventure, so we’re relocating to the Mid-Atlantic, where I’ve been offered my dream job. The change is exciting and terrifying all at once, as any great adventure should be. The past few months have felt a lot like this:

Bill Watterston, Calvin & Hobbes.

Bill Watterson, Calvin & Hobbes.

We’re right on the verge of the steepest slope now, packing up our home this weekend, and anticipating a couple of months of rootlessness before we move into our new home in Delaware in May. Throughout the process so far, I have tried to safeguard my health by sticking to my anti-inflammatory eating plan, continuing to make time for yoga, and trying (trying!) to get a reasonable amount of sleep each night. I’m justifiably anxious about continuing to eat healthfully during the months ahead, when I will no longer have my usual well-stocked and well-equipped kitchen at my disposal.  I’m putting faith in my own creativity and commitment to my health, and hoping for some luck not crashing the sled.

As my regular readers know, the Gent and I celebrate “Pancake Sunday” each week, enjoying a new pancake flavor and topping combination every week for the last four years or so. The last Pancake Sunday in our first home together, the home where we got married, offered us a taste of spring, the season that embodies new beginnings. We drizzled fluffy, gluten-free, vanilla poppyseed pancakes with a bright but balanced, dairy-free, lemon custard sauce generously studded with fresh, tart raspberries.

LemonRaspberryPancakes

Lemon Custard Sauce

 This easy, microwaveable custard has a pourable, sauce-like consistency, and is equally delicious on breakfast pancakes or desserts. Try it with fresh fruit or as a dip for graham crackers.

3 Tbsp coconut sugar

2 egg yolks

1 can full fat coconut milk

1 Tbsp arrowroot powder

zest of 1 lemon

juice of half a lemon

In a medium-sized, microwaveable glass bowl, whisk together the coconut sugar, egg yolks, and lemon zest for about 1 minute. Set aside.

 In a 2-cup (or larger) Pyrex measuring pitcher or second bowl, whisk the arrowroot powder, coconut milk, and lemon juice until well combined. Heat in the microwave for about 2 minutes on HIGH until hot but not boiling.

Slowly whisk the hot coconut milk mixture into the egg mixture. Microwave the combined mixture on HIGH for 2 minutes. Whisk until smooth. Return to the microwave for another two minutes. Whisk again. Microwave for an additional minute or two, until mixture is slightly thickened. Cover the bowl and refrigerate overnight.

The next day, whisk the cooled sauce until smooth. It should have a thick but pourable consistency.  Enjoy!

Posted in Anti-Inflammatory Ingredients, Breakfast, citrus, coconut oil (virgin/ unrefined), Dairy-free, Desserts, fruit, Gluten-free, Nut-free, Recipes | Leave a comment

Butternut* Tiramisu (GF/DF/NS)

After several months of seemingly non-stop travel for each of us (most of it work-related), the Midwestern Gentleman and I decided to stay home and have Thanksgiving for two this holiday season. I had recently discovered gluten free lasagna noodles at our local grocery store, which led me to create an Italian-Pilgrim fusion menu for our private Thanksgiving.

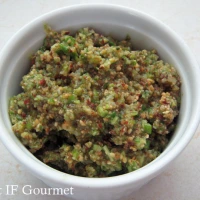
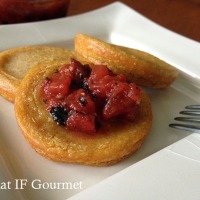
We started the evening with impromptu cocktails at our neighbors’ cozy home. I brought over a savory seed pate with gluten-free crackers to add to their cheese and cracker plate with sliced apples, all of which paired surprisingly well with the smoky-sweet bourbon and chocolate cocktails.

ThanksgivingSalad

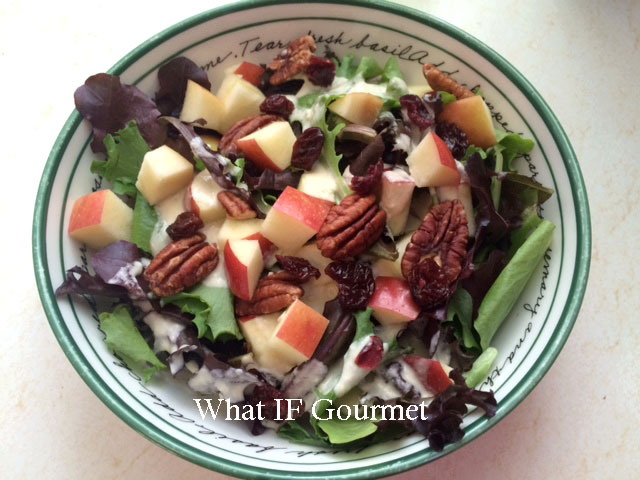
Back at home, we tucked into a baby greens salad with diced apples, dried cranberries, and toasted pecans, drizzled with a homemade, dairy-free, creamy citrus-garlic dressing.  Our turkey and herb lasagna was everything I’d hoped it would be — creamy, savory, and filling, even without the gluten and dairy.  Lasagna is back on the menu!

Finally, we rounded out the meal with a butternut tiramisu.  The Gent had requested pumpkin tiramisu, but our local market didn’t carry sugar pumpkins past Halloween this year. I turned to butternut squash instead, and the results met with approval from both of us.  This lightly spiced, dairy-free tiramisu is not too sweet, nor too heavy to finish off a rich meal, but it also tastes perfectly wonderful for breakfast the next day.  Happy Thanksgiving, y’all!
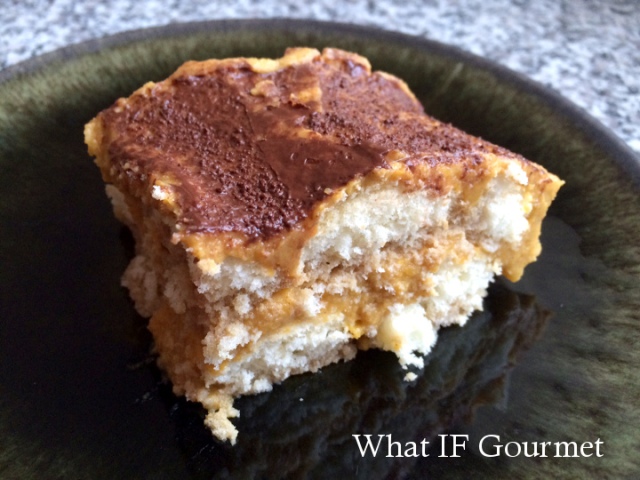
ButternutTiramisu

Butternut* Tiramisu

1 butternut squash (*or sugar pumpkin)

3 egg yolks

1 can full fat coconut milk

1/4 cup raw agave syrup

1 tsp vanilla

1 tsp cinnamon

1/4 tsp nutmeg

pinch salt

***

1 cup strong, brewed coffee

2 tsp Marsala wine

***

1 package Schar gluten-free ladyfinger cookies

1 Tbsp unsweetened cocoa powder, for dusting

Brew coffee and set aside in a shallow bowl to cool.  Set the eggs out on the counter to come to room temperature.

Preheat oven to 350 F.  Cut the butternut squash in half and scoop out the seeds. Place cut-side down on an oiled baking sheet and roast for about an hour, or until soft when pierced with a fork.  Alternatively, you can steam or microwave the squash to save time, but the flavor will be sweeter when cooked in the oven.

Let the cooked squash cool until comfortable to the touch, and then then peel off the skin. Put the peeled squash into a food processor and puree until very smooth.

Fill a large pot with ice and water and set aside.

Separate the eggs, reserving the whites for another use.  In a medium bowl, whisk the egg yolks until smooth. Gradually whisk in the coconut milk, agave nectar, vanilla, spices, and pinch salt. Pour the mixture into a 2-quart saucepan with a heavy bottom, and whisk in 2 cups of the butternut puree.  Continue to stir, slowly but constantly, over medium heat until the mixture thickens, about 15 minutes.  Set the pan in the pot of ice water and continue to stir until the mixture cools to room temperature.  The mixture should continue to thicken as it cools.

Assemble the tiramisu in a small baking pan (I used a 7″ x 5″ ceramic baking dish).  Add the Marsala to the coffee and stir to combine. Dip the ladyfingers into the coffee mixture one by one, allowing them to absorb some of the liquid, but not so much that the cookie falls apart.  Line the baking dish with half of the ladyfingers. Dollop half of the butternut custard onto the ladyfingers, and spread evenly. Repeat with the remaining ladyfingers and butternut custard.  Using a mesh sifter, sprinkle the cocoa powder evenly over the top of the tiramisu.  Cover with plastic wrap and refrigerate for at least 4 hours before serving.

 ButternutTiramisu2

Posted in Anti-Inflammatory Ingredients, Breakfast, Dairy-free, Desserts, Gluten-free, Nut-free, pumpkin/squash/gourds, Recipes, spices, Vegetarian | 2 Comments

Snack or Side: Zesty Caramelized Butternut Squash

ButternutSquash

This may not be your typical Sunday afternoon football snackie, but a bowl of salty, slightly spicy, caramelized cubes of butternut squash fit the bill for me last weekend.  This easy-to-make hot snack (or side dish) has all the nesty appeal of french fries, with a lot more nutritive bang. So, snack away!

Zesty Caramelized Butternut Squash

1 butternut squash, peeled and cubed into 1/2″ pieces

2 Tbsp olive oil

1/4 tsp granulated garlic (or slightly less garlic powder)

1/4 tsp freshly ground black pepper

1/2 tsp ground coriander seed

1/2 tsp salt

***

Garnish: 2 to 3 scallions, white and green parts thinly sliced

Preheat oven to 400 F.  Line one large or two small baking trays with parchment paper.  Toss butternut squash with other ingredients (except scallions) in a large bowl until well coated.  Spread out on baking trays and roast in the oven for 15 minutes.  Check on the squash and stir the cubes around, making sure none of them are burning.  Roast for another 12 to 15 minutes, until brown and caramelized along the edges, and tender all the way through.  Serve the squash hot, garnished with sliced scallions.

Posted in alliums (garlic/onions), Anti-Inflammatory Ingredients, Appetizers, Dairy-free, Gluten-free, herbs, monounsaturated oils, Nut-free, pumpkin/squash/gourds, Recipes, seeds, Snacks, spices, Vegan, Vegetarian | 1 Comment

Product Review: XyliMelts

This post is for my fellow Sjogren’s Syndrome sufferers, or anyone else with chronic dry mouth.

XyliMelts

Usually, I keep a bottle of water and Biotene mouth spray on my bedside table, since I know I will wake up half a dozen times during the night with cotton mouth.  However, on the recommendation of some fellow “Sjoggies,” I recently decided to try XyliMelts, a xylitol-containing oral lozenge with a food-safe adhesive on one side.  To use the lozenge, you moisten it and stick it to your molars at the outer gumline.  It took me a while to get the lozenge to stay put the first time, but once I figured it out, it stayed in place all night.  The lozenge slowly dissolved all night long, allowing me to sleep through the night and wake up feeling refreshed.  I tried the mint flavor, which is very light and not at all overpowering.  Alternatively, XyliMelts come in a mint-free version (although I have yet to try it).  The lozenges are also free of the major allergens: gluten, corn, dairy, soy, nuts, eggs.

Not only do these lozenges keep my mouth moist through the night, but they contain xylitol, which has anti-viral properties.  During the day, I chew xylitol-containing gum on the advice of my dentist, so I am pleased to have a form of xylitol lozenge that I can use at night as well.  Since I started using xylitol gum daily, I no longer get the Sjogren’s mouth sores that used to plague me.

If you try this product, let me know what you think.  Please share if you have other successful strategies for combating night-time dry mouth as well.

Note: I purchased this product myself, and I have not been compensated in any way to review this product.

Posted in Anti-Inflammatory Ingredients, Dairy-free, Gluten-free, Nut-free, Product Reviews | Tagged , , | 4 Comments

Watermelon Drinks for Sultry Summer Days (GF/DF/V/NS)

The fall semester started this week in Universityland, and Mother Nature rolled out the high heat and humidity as if concerned we might all forget it is still technically summer.  The mammoth watermelons in our CSA share provide a sweet, refreshing, and hydrating antidote to the oppressive weather. Sadly, the Gent is allergic to all melons, so I’m on my own enjoying these treats. I love fresh, plain watermelon straight up, but with so much to eat, I have taken to removing the seeds, chopping the pink flesh into chunks, and freezing it to enjoy later, too.  Here are three refreshing ways to use frozen watermelon for a cool summer treat.

Watermelon Cream Cooler, garnished with mint.

Watermelon Cream Cooler, garnished with mint.

Watermelon Cream Cooler

2 cups frozen watermelon chunks

1/2 cup chilled coconut milk

1 cup cold water

4 to 5 large mint leaves

Combine ingredients in a blender or food processor and puree until frothy. Serve immediately.

Green Watermelon Chiller, garnished with lemon balm.

Green Watermelon Chiller, garnished with lemon balm.

Green Watermelon Chiller

1 cup frozen watermelon chunks

1/2 cup cubed cucumber*

1 large handful baby spinach

4 to 5 lemon balm leaves

1 cup cold water

*If you have a powerful blender like a Vitamix, there is no need to peel the cucumber before cubing it.

Combine ingredients in a blender or food processor and puree until frothy. Serve over ice. This drink is one of my favorite ways to rehydrate after a hard workout; its herbal flavor is refreshing without being too sweet.

Tropical Watermelon Sherbet

Tropical Watermelon Sherbet

Tropical Watermelon Smoothie

1 cup frozen watermelon chunks

1 cup frozen banana slices

1/2 cup frozen pineapple (and/or mango) chunks

1 cup cold water

Combine ingredients in a blender or food processor and puree until smooth. Serve immediately as a smoothie; or, to serve as a sherbet, scoop into a freezer-safe container and freeze for 1-2 hours before serving.

Stay frosty!

Posted in Anti-Inflammatory Ingredients, Beverages, Breakfast, Dairy-free, Desserts, fruit, Gluten-free, greens, herbs, Nut-free, Recipes, Snacks, Vegan, Vegetarian | Tagged | 2 Comments

Due North

Every year since the Midwestern Gentleman and I met, we have taken a late-summer vacation on the North Shore of Lake Superior in Minnesota.  We’ve been particularly excited about this year’s trip, because we secured a phenomenally beautiful, hike-in campsite on a bluff overlooking the lake at Split Rock Lighthouse State Park. All year, my “happy place” in my mind has been that secluded and serene spot.  However, my summer has been so riddled with flare-ups and secondary infections that I was secretly worried I would be too sick to travel and would ruin our annual tradition.  It never occurred to me that the Gent might be the one to derail our plans!  His accidental injury was a good reminder never to take anything for granted.  Fortunately, he seems to be healing rapidly, so we are still going to attempt the trip north for some camping and hiking, albeit a bit more slowly and cautiously than otherwise.

Lake Superior inlet at Tettegouche State Park, MN.

Lake Superior inlet at Tettegouche State Park, MN.

Since our campsite is a hike-in spot, plus the Gent’s ability to haul a heavy pack has been compromised, we have stripped down our usual camping gear to the bare minimum. This means we won’t be bringing the elaborate camp kitchen I packed last year.  We’ll enjoy simple breakfasts of coffee, gluten-free granola, and fruit, and rely on local restaurants for our dinners.  In preparation, I’ve researched gluten-free friendly establishments along Highway 61.  I’ll post detailed reviews of the places we try, but in the meantime, here is the list I’ve assembled:

Duluth, MN

Two Harbors, MN

Beaver Bay, MN

Tofte, MN

Grand Marais, MN

Remember, menus are rarely static, and some restaurants may not list gluten-free items on the menu even if they are willing to work with you to create a safe meal.  If you’re traveling and dining out gluten-free, it’s always a good idea to call ahead to figure out what your options are.

*Northshore Pizza Cafe & Coffee House is the one place we know well, from before and after I went gluten-free. It’s my favorite pizza parlor in the Midwest, and well worth a visit. See my review here. Although the review is from a time when I still ate gluten, I have since enjoyed the gluten-free pizza there, as well.

Posted in Breakfast, Camping, Domestic, Entrees, Gluten-free, hiking, Just Keep Me Movin', Restaurant Reviews, Travel | Tagged , , | Leave a comment

Simple Things: Chipotle-Ranch Bean Dip

Chipotle-Ranch Bean Dip drizzled with olive oil for an extra boost of omega-3s.

Chipotle-Ranch Bean Dip drizzled with olive oil for an extra boost of omega-3s.

I love to cook (um… obviously). For me, cooking is a relaxing, creative outlet, and one of my favorite ways to end a busy work day. While following an anti-inflammatory diet keeps me energetic and pain-free most of the time, I do still experience the occasional “bad day,” when my Sjogren’s Syndrome (a form of autoimmune arthritis) flares up, putting me down on the couch when I would rather be in the kitchen. And let’s face it, even if you’re not managing a chronic illness, you still have days that are busy and tiring; at those times, the temptation to indulge in unhealthy “convenience” foods can be overwhelming.  This ridiculously easy, nutritious bean dip is one of my favorite weapons in my quest to continue to make healthy food choices even when an autoimmune flare-up saps my will to cook. It comes together literally in minutes, and tastes great with raw veggies and baked whole-grain chips, or spread on wraps or bagels.  It’s also an easy-to-make and easy-to-pack lunch to take to work or school.

Chipotle-Ranch Bean Dip with dark red beans, and served with sliced CSA cucumbers and black bean quinoa tortilla chips.

Chipotle-Ranch Bean Dip with dark red beans, served with sliced CSA cucumbers and black bean quinoa tortilla chips.

You can make this dip with any beans you like — white, red, or black — but my favorite way to make it is with dark red beans, which are high in anti-inflammatory anthocyanins, and result in a pretty pink dip.  I use homemade ranch seasoning that I assemble from the bulk spice aisle at our local food co-op, but any ranch seasoning will do if you’re happy with its ingredients.

Chipotle-Ranch Bean Dip

about 1 1/2 cups beans (cooked) or 1 can beans (drained and rinsed)

1 1/2 tsp ranch seasoning

1/4 tsp chipotle pepper powder (or to taste)

1/2 tsp salt (or to taste)

juice of 1/2 a lemon

3 Tbsp olive oil

Combine all of the ingredients in a food processor and puree for 1 to 2 minutes, or until dip reaches desired consistency. Adjust seasonings to taste. Store in an airtight container in the refrigerator for up to a week.

Posted in alliums (garlic/onions), Anti-Inflammatory Ingredients, Appetizers, chile pepper, citrus, cruciferous vegetables, Dairy-free, Entrees, Gluten-free, herbs, legumes, monounsaturated oils, Nut-free, Recipes, Snacks, spices, Vegan, Vegetarian | 1 Comment